Not long ago, building a 3D model meant hours in specialized software, a steep learning curve, and a fair amount of patience. Artists sculpted meshes by hand, polygon by polygon, and even simple objects could take a full day. Today, a single photograph can be the starting point for a usable 3D asset, and the process takes minutes.
This shift comes from advances in artificial intelligence. Modern image to 3d tools can look at a flat picture, infer depth, shape, and surface detail, and produce a model you can rotate, edit, and export. This article explains how the technology works, where it is useful, how to get better results, and what to watch for when choosing a tool.
What Does “Image to 3D” Actually Mean?
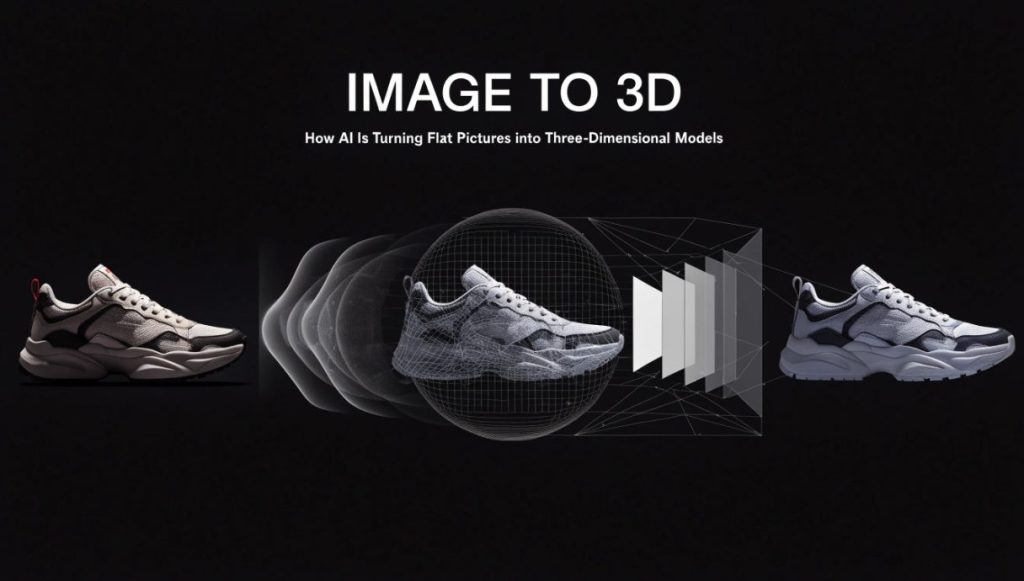
At its simplest, image-to-3D conversion means generating a three-dimensional digital object from one or more two-dimensional images. A photo only records what the camera saw from one angle, so the software has to work out what the object looks like from the sides, the back, and underneath.
Traditional approaches, such as photogrammetry, solved this by requiring dozens or even hundreds of photos taken from many angles. The software matched points across the images and calculated their positions in space. It worked, but it demanded careful shooting, good lighting, and heavy processing.
AI-based methods changed the equation. Trained on enormous collections of 3D objects and images, these systems learn what things generally look like: how a chair’s legs are arranged, how a shoe curves around the heel, how a character’s body is proportioned. Given just one picture, they predict the hidden geometry and textures. That is why an image to 3d model workflow can now start with a single JPG or PNG instead of a full photo shoot.
How the Technology Works
The details vary between systems, but most follow a similar pipeline.
1. Image analysis. The AI first examines the picture, separating the main subject from the background and identifying edges, shading, and perspective. These visual cues hint at how far each part of the object is from the camera.
2. Depth and shape estimation. Using patterns learned during training, the model estimates a depth map and builds a rough 3D structure. Where the image doesn’t show the back or sides, the model fills in the gaps with its best prediction based on similar objects it has seen.
3. Mesh generation. The predicted shape is converted into a mesh, a network of vertices, edges, and faces that defines the surface. This is the standard format used by game engines, 3D printers, and design software.
4. Texture mapping. Colors and surface details from the original photo are projected onto the mesh, so the model keeps the look of the source image. Some tools also generate materials with properties like roughness or reflectivity.
5. Export. The finished model is saved in a common format such as OBJ, GLB, FBX, or STL, ready to use in other programs.
Where Image-to-3D Is Being Used
The appeal of this technology is how many fields can benefit from it.
Game Development and Animation
Game studios and indie developers constantly need props, environment pieces, and background objects. Generating a base mesh from concept art or a reference photo lets artists skip the blocking stage and spend their time refining and optimizing instead. For small teams with limited budgets, this can be the difference between shipping a project and shelving it.
E-Commerce and Product Visualization
Shoppers increasingly expect to inspect products from every angle, and some stores now offer augmented reality previews that place a sofa or lamp in the buyer’s room. Turning existing product photos into 3D models makes these experiences much cheaper to build, especially for catalogs with thousands of items.
3D Printing and Prototyping
Hobbyists, designers, and engineers use 3D models to print figurines, replacement parts, and prototypes. Starting from a photo or sketch means you can get to a printable file without modeling from scratch. The output usually needs cleanup, but it shortens the path from idea to physical object considerably.
Architecture, Interior Design, and Real Estate
Designers can convert photos of furniture, decor, or building elements into 3D assets for mockups and visualizations. This helps clients see how a space might look before anything is bought or built.
Education and Cultural Heritage
Museums and schools can turn photographs of artifacts, fossils, or specimens into interactive 3D objects that students explore from anywhere. It makes physical collections more accessible without risking fragile originals.
Social Media and Creative Projects
Creators use generated 3D models for avatars, stickers, short animations, and AR filters. Because the barrier to entry is low, people without any 3D training can experiment and produce eye-catching content.
Tips for Getting Better Results
AI conversion is impressive, but the quality of your input strongly affects the quality of your output. These habits make a noticeable difference.
Use a clear, well-lit photo. Soft, even lighting helps the AI read the shape accurately. Harsh shadows and glare can be misinterpreted as geometry or color.
Keep the background simple. A plain backdrop makes it easier for the system to isolate the subject. If your photo has a cluttered background, remove it first.
Choose the right angle. A three-quarter view, slightly above the object, usually shows the most surface information. A straight-on photo can flatten depth cues, while an extreme angle can distort proportions.
Make sure the whole subject is visible. Cropped edges force the AI to guess more. Leave a little space around the object.
Start with high resolution. Sharper images carry more detail for textures and fine features. Avoid heavily compressed or blurry files.
Pick suitable subjects. Solid, opaque objects with defined shapes tend to convert best. Transparent materials, mirrors, thin wires, and very fine textures like fur are harder for any system to reconstruct.
Plan for cleanup. Even good results often benefit from light editing in tools like Blender. Think of the AI output as a strong first draft rather than a finished product.
Limitations to Keep in Mind
It is worth being realistic. Single-image generation involves a lot of inference, so the hidden sides of an object are educated guesses. Symmetrical or common objects usually come out well, while unusual or highly detailed items may show errors on the back or underside. Meshes can also be denser or messier than hand-built ones, which matters for real-time applications like games where performance is critical.
For precision work, such as engineering parts with exact tolerances, AI-generated models are better used as a starting point than a final specification. And as with any tool that uses source images, you should make sure you have the right to use the photo, especially for commercial projects.
What to Look For in a Conversion Tool
With so many options appearing, a few criteria help narrow the choice:
- Ease of use. You should be able to upload an image and get a result without installing heavy software or learning complex settings.
- Output quality. Look at example models for clean geometry, accurate proportions, and convincing textures.
- Export formats. Make sure the tool supports the formats your workflow needs, whether that is GLB for the web, FBX for animation, or STL for printing.
- Speed. Fast turnaround lets you iterate, trying different photos or angles until the result looks right.
- Pricing and licensing. Check usage limits and whether generated models can be used commercially.
If you want to try the process yourself, a photo to 3d model converter is a low-risk way to see how your own images translate into three dimensions. Testing a few different photos is the quickest way to learn which subjects and angles work best.
The Road Ahead
The pace of improvement in this field is rapid. Newer models produce cleaner meshes, better materials, and more consistent results from a single view. Researchers are also working on systems that combine text prompts with images, allowing users to guide the output with descriptions, and on tools that generate fully rigged, animation-ready characters.
As these capabilities mature, 3D creation will likely become as ordinary as photo editing is today. Designers will prototype faster, small businesses will present products in richer ways, and hobbyists will bring ideas to life without years of technical training. The role of skilled 3D artists won’t disappear, but their time will shift toward creative direction, refinement, and the parts of the work where human judgment matters most.
Conclusion
Image-to-3D technology takes one of the most time-consuming parts of digital creation and compresses it into a few clicks. By learning from vast amounts of 3D data, AI can infer the shape and texture of an object from a single picture and deliver a model ready for games, printing, AR, or visualization.
The results depend on good input, realistic expectations, and a bit of cleanup, but the value is clear: faster workflows, lower costs, and wider access to 3D content. Whether you are a developer, designer, educator, or curious hobbyist, an image to 3d model tool is a practical way to start turning your pictures into something you can rotate, share, and build on.